
What are Lockout Controls?
Lockouts let you customize the Sphero Edu app by disabling features to match your preferences or your school or district’s policies. Lockout Controls are available in version 8.3.4 or newer.
-
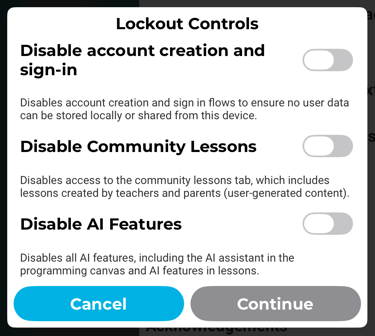
Account Creation and Sign In
This lockout prevents users from creating accounts or signing in, ensuring that no user data is sent to Sphero Central servers. Enable it if your school or district prohibits accounts in any capacity. - AI Assistant
The AI Assistant is limited to reviewing programs for errors and explaining how they work. Users cannot create their own prompts, and the feature does not capture user data. Learn more here. However, enable this lockout if your school or district prohibits AI use. - Community Lessons*
Most lessons in Sphero Edu are created by Sphero’s professional content team. Teachers can also create and submit community lessons, which are reviewed to ensure they are safe for students. Enable this lockout if your school or district does not allow access to user-generated content.
* The web version of Sphero Edu does not have the option to lockout community lessons since it does not display the community lessons to users.
How Do I Enable Lockouts?
-
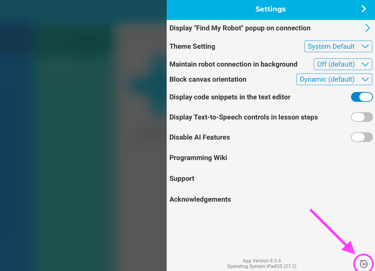
From the main onboarding sign-in screens or the Settings screen, locate the Sphero icon in the bottom right corner. Here's an example from the settings screen on the iOS app:
-
Tap or click the Sphero icon three times quickly
-
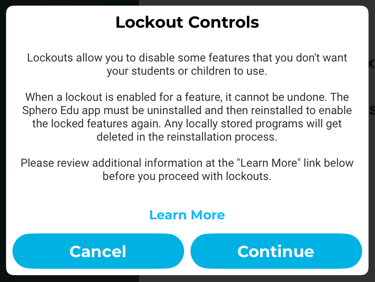
A popup for "Lockout Controls" will appear
-
On the second popup, toggle the lockouts you wish to enable
-
Continue to the next screen, where you can commit to the lockout features
Important Notice:
Once lockouts are enabled, the Lockout Controls menu is removed to prevent students from changing or undoing your selections.
To re-enable locked features in the Sphero Edu app, you must uninstall and reinstall the app. This process deletes all locally stored programs.
For the web version of Sphero Edu, clear your browser cache to regain access to Lockout Controls.